What happened at Rorke's Drift?
The British garrison held. On 22 and 23 January 1879, hours after Isandlwana, about 140 to 150 men under Lieutenants Chard and Bromhead, a quarter of them hospital patients, beat off some 3,000 to 4,000 Zulus under Prince Dabulamanzi kaMpande for about 12 hours. Seventeen defenders died; the Zulu dead are put at 350 to over 500.1
On the afternoon of 22 January 1879, two horsemen galloped up to the Buffalo River with news that the British camp at Isandlwana had been destroyed. At the mission station of Rorke's Drift, a supply depot and field hospital on the Natal bank, about 140 men had perhaps an hour to decide whether to run or fight. They built walls of maize bags and biscuit boxes, and that night they held them against thousands of Zulu warriors. The story of the Battle of Isandlwana, fought the same day, explains how the disaster came about; this is the story of the defense, of the men who attacked it, and of the film that made it famous.2
Why was there a British garrison at Rorke's Drift?
Rorke's Drift took its name from James Rorke, a trader who had built a house and a store beside a ford on the Buffalo, or Mzinyathi, River, which then marked the border between the British colony of Natal and the Zulu kingdom. After his death in 1875 the farm passed to a Swedish mission under Otto Witt, which used the store as a chapel. The hill behind the station became the Oskarberg; the Zulus called it Shiyane.3

In December 1878 the British high commissioner, Sir Bartle Frere, sent King Cetshwayo an ultimatum that Britannica calls designed to be impossible to satisfy, including the dismantling of the Zulu military system. When it expired, Lord Chelmsford's center column crossed into Zululand at Rorke's Drift on 11 January 1879. The army turned Rorke's house into a hospital and the chapel into a commissariat store, and left a small garrison to guard the river crossing and pass supplies forward.4
On 22 January that garrison was one company of the 2nd Battalion, 24th (2nd Warwickshire) Regiment, B Company under Lieutenant Gonville Bromhead, with a detachment of the Natal Native Contingent, hospital staff and commissariat officers. Major Henry Spalding, in charge of this stretch of the line of communications, rode to Helpmekaar, about 10 miles away, in the early afternoon to hurry up a company that was overdue, leaving the senior officer on the spot, Lieutenant John Chard of the Royal Engineers, in charge. Chard was at the river looking after the ferry ponts.5
Who attacked Rorke's Drift, and why?
The force that came to Rorke's Drift was the part of the Zulu army that had missed the victory. At Isandlwana the regiments of the Undi corps had been held back as a reserve. When the attack broke out they were sent wide around the west of Isandlwana hill to cut the road back to Rorke's Drift, and so took almost no part in the fighting at the camp. Their commander was Prince Dabulamanzi kaMpande (1839 to 1886), a half-brother of King Cetshwayo.6

The official British narrative of 1881, compiled from Zulu statements, names the reserve regiments under Dabulamanzi as the uThulwana and the uQikazi; G. A. Chadwick's 1979 study of the battlefield adds the uDloko and the younger iNdluyengwe, which had pursued the fugitives from Isandlwana down to the river. In the afternoon these regiments crossed the Buffalo downstream of the drift and came at the station from behind Shiyane hill.7
In crossing the river they went beyond what the king wanted. Cetshwayo's policy was to fight a defensive war on his own soil and hope to negotiate, and Britannica notes that his soldiers were forbidden to carry the war into Natal. Bourquin, writing for the 1979 centenary, likewise stresses that the king would defend his country but had no intention of invading the colony. South African History Online calls the attack a move against Cetshwayo's orders.8
Why, then, did Dabulamanzi go? The sources stress the frustration of men who had marched to war and watched others win its greatest battle. EBSCO's account by John Powell calls him impetuous and says the fresh reserves defied orders to destroy the garrison left at the crossing; Randall Milstein, in a second EBSCO survey, writes that he was eager for a fight after being denied action at Isandlwana. In Zulu terms Rorke's Drift was a raid by the reserve that hoped to share the honor of the day, not a planned operation of the Zulu command.9
Why didn't the garrison retreat?
At about 3:15 p.m. Chard was at the ponts when Lieutenant Adendorff of the Natal Native Contingent and a carbineer rode up from Isandlwana with the news. A note from the column had already told Bromhead that the enemy was advancing and that the post was to be strengthened and held. Bromhead had begun to loophole the store and the hospital, and Acting Assistant Commissary James Dalton argued that a retreat with wagons full of sick men would be overtaken in the open. Chard agreed: they would fortify the station.10
The building material was the depot itself. Bags of maize (mealies), each weighing about 200 pounds, and heavy wooden biscuit boxes were stacked into a breastwork that joined the store to the hospital, with two wagons worked into the line. Doors and windows were barricaded and the walls loopholed for rifles.11
Then the garrison shrank. A troop of Durnford's Horse, sent to watch the drifts, rode off toward Helpmekaar as the Zulus approached, and the Natal Native Contingent company left with its officer. The official count puts the men still inside the post at 139, of whom 35 were sick; Chadwick reckons that about 120, counting the walking sick, could man the walls. Seeing that the perimeter was too long, Chard started an inner wall of biscuit boxes across the yard. It was two boxes high when the first Zulus appeared.12

How did the battle unfold?
At about 4:30 p.m., by Chard's report, 500 or 600 Zulus came round the hill to the south and charged the south wall. Fire from the wall and from the store checked them about 50 yards out, and most swung left around the hospital to rush the northwest wall of mealie bags, where they were thrown back after a short, desperate fight. Chadwick identifies this first wave as the iNdluyengwe.13
The main body followed. Some warriors lined the rocky ledges of Shiyane, about 400 yards to the south, and fired down into the yard, many of them with Martini-Henry rifles taken at Isandlwana that morning; Chard thought the fire badly aimed, but it took his men in the back. Others worked through the garden and the bush, which there had been no time to clear, until they held one side of the wall while the defenders held the other.14
Assault after assault was met with the bayonet. Chard singled out Corporal Christian Schiess of the Natal Native Contingent, who fought on although he had been wounded in the foot a few days earlier. By about 6 p.m. the fire from the hill was so heavy that Chard pulled his men back behind the biscuit-box wall, giving up the yard in front of the hospital.15
What happened in the hospital at Rorke's Drift?
That left the hospital outside the new line. Rorke's old house was a row of small rooms, several opening only to the outside, with mud-brick inner walls and a thatched roof. The Zulus set fire to the thatch and broke in, and the few soldiers posted inside fought from room to room while the patients were moved.16
The citations published in the London Gazette tell it room by room. Private John Williams held a distant ward with Private Joseph Williams and Private William Horrigan for more than an hour, until the Zulus burst in, killed Joseph Williams and two patients, and John Williams broke through the partition with the last two patients. In the next room he found Private Henry Hook; one fighting while the other dug, the two broke through three more partitions and passed eight patients through a small window into the inner line.17
In another ward Privates William Jones and Robert Jones held the door until six of seven patients were out. The seventh, Sergeant Robert Maxfield, was delirious with fever and would not move; when Robert Jones went back for him he found him being stabbed in his bed. Not everyone could be saved, Chard wrote, from the want of communication between the rooms and the burning of the house.18
How did the defense end?
With the hospital burning and the Zulus trying to fire the roof of the store, the defenders heaped two piles of mealie bags into a high redoubt, which gave a second line of fire all round and a shelter for the wounded. As darkness fell they were forced back again, to the middle and then the inner wall of the stone cattle kraal on the east side, and there they stayed. The burning hospital lit up the ground in front of them.19
The attacks went on until after midnight and the firing until about 4 a.m. on 23 January. At daybreak the Zulus were gone over the hill to the southwest. At about 7 a.m. a large body reappeared on the hills, and the garrison manned the walls again, but soon afterward (about 8 a.m. by Chard's report) Chelmsford's column, marching back from the ruined camp at Isandlwana, came into sight and the Zulus fell back as it approached. Chadwick notes that Chelmsford's men had passed the withdrawing Zulus near the Batshe River at dawn and that neither side, exhausted, sought a fight.20
How many died at Rorke's Drift?
The British lost 17 dead, the figure in Chard's report, the National Army Museum's account and the Talana Museum's; the National Army Museum adds that almost every man in the garrison was wounded in some way. EBSCO's surveys count 15 killed in the fighting, and Milstein adds 2 who died of wounds later.21
The Zulu losses are less certain. Chard estimated the attackers at about 3,000 and wrote that his men killed about 350. The official British narrative of 1881 says about 400 bodies were found around the post; Chadwick gives 400 or 500, the Talana Museum about 500, and Britannica more than 500. Powell adds a similar number of wounded.22
What happened to those wounded is disputed. The battlefield historians Ron Lock and Peter Quantrill, in their book Zulu Victory as reported by The Guardian in 2003, published letters and journals including Lieutenant Colonel John Crealock's private journal, which records 351 Zulu dead and 500 wounded, and a trooper's admission that the British, bitter at the killing of patients in the hospital, did not spare wounded Zulus. Lock and Quantrill conclude that the wounded were probably all killed, and place the killings on the relief force rather than the exhausted garrison.23
Who won the Victoria Cross at Rorke's Drift?
Eleven men received the Victoria Cross for Rorke's Drift, along with five Distinguished Conduct Medals (one of them later withdrawn). The London Gazette of 2 May 1879 announced eight: Lieutenants Chard and Bromhead, Corporal William Allen and Privates Frederick Hitch, Henry Hook, Robert Jones, William Jones and John Williams.24
Three more followed later in 1879: Surgeon-Major James Henry Reynolds, for his constant care of the wounded under fire (gazetted 17 June); Acting Assistant Commissary James Langley Dalton (18 November); and Corporal Christian Schiess of the Natal Native Contingent (War Office notice of 29 November, gazetted 2 December).25

Seven of the eleven went to the 24th Regiment, which HistoryNet's Chuck Lyons and EBSCO's Randall Milstein both describe as the record for one regiment in a single action. The National Army Museum notes that the government seized on the defense, issuing awards in the hope of diverting attention from Isandlwana; Frederick Hale, writing in 1996, calls the battle arguably an unnecessary and peripheral event that nonetheless produced no fewer than eleven crosses.26
Who won the Battle of Rorke's Drift, and did it matter?
The British held the post and the Zulus withdrew, so as a battle it was a clear British defensive victory. It changed little else. The National Army Museum judges that it had little effect on the war as a whole, and Powell calls its strategic significance minimal but its moral value great. Chadwick, who knew the ground, asks whether it really saved Natal at all, given that the attackers had exceeded the king's orders by crossing the border.27
Its importance was political. Britannica notes that the news of Isandlwana galvanized the British government into a full-scale campaign to save face, and the National Army Museum that the awards for Rorke's Drift were meant to divert attention from the disaster. The war went on to Hlobane and Khambula in March and ended with the defeat of the Zulu army at Ulundi on 4 July 1879. Cetshwayo was captured in August.28
For the Zulu kingdom the reckoning was different. Bourquin, writing from the Zulu side of the record, calls the war unjust: a pretext was found, and the ultimatum demanded the demolition of the whole Zulu state. The Zulu regiments, in his words, fought as their laws demanded. South African History Online records that a memorial to the Zulu warriors was added at the site in 1999.29
How accurate is the film Zulu?
The 1964 film Zulu, with Stanley Baker as Chard and Michael Caine as Bromhead, made the battle famous around the world, and the future South African politician Mangosuthu Buthelezi played his great-grandfather, King Cetshwayo. Hale reports the verdict of the historian Ian Knight that, apart from details of uniform and equipment and some cinematic license, it is an essentially realistic production. Its big liberties lie in people and in its Welsh framing.30
The regiment was not Welsh in 1879. It was the 24th (2nd Warwickshire) Regiment of Foot; its depot had moved to Brecon only in 1873, and it became the South Wales Borderers in the army reforms of 1881. Recruits from the Welsh border country served in it, but the BFI's review of the film notes that English soldiers were in the majority at Rorke's Drift, and HistoryNet puts the English at more than half.31
That makes the film's most famous scene, the garrison answering the Zulu war chants with “Men of Harlech”, part of its Welsh theme rather than the record: HistoryNet calls it historically inaccurate, and neither Chard's report nor the official narrative mentions any singing. The ending is invented too. In the film the Zulus return to salute the defenders as fellow braves; in Chard's report and the official narrative they fall back as Chelmsford's column comes into sight.32
The characters suffer most. The Reverend Otto Witt, played by Jack Hawkins as a pacifist drunk who is driven off in a carriage with his grown-up daughter, had in fact left on horseback before the attack to join his family. Hale, who traced Witt's own papers, shows that he had cooperated with the army over the use of his station and that his daughter was two years old; he calls the portrayal a caricature, and the BFI notes that Witt was no drunkard. Private Henry Hook, played as a malingering rebel, was by other accounts a model soldier who had taken the temperance pledge in Natal.33
Where is Rorke's Drift?
Rorke's Drift lies on the Buffalo (Mzinyathi) River in what is now KwaZulu-Natal, South Africa, southeast of the town of Dundee on the province's battlefields route. The mission buildings were pulled down and rebuilt after 1879, and the British dead lie in a small cemetery just south of the post, near the later memorial to the Zulu warriors.34
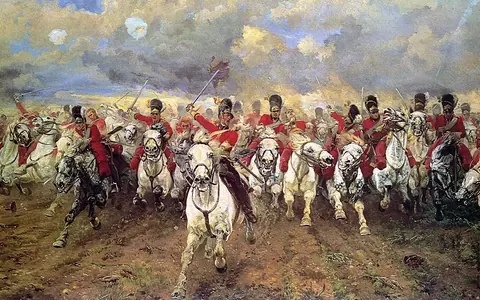
In Britain the battle is remembered in Brecon, whose Regimental Museum of The Royal Welsh keeps the 24th's Zulu War collections, and in the paintings by Lady Butler, commissioned by Queen Victoria and finished in 1880, and by Alphonse de Neuville. Our pages on Britain's military history, the greatest last stands and battles won against the odds set it beside other defenses of its kind.35